
It's 3 p.m. Your shoulders ache, and the bra that looked fine at the mirror this morning is the loudest thing in the room. The band still sits where you left it. The cups don't. Tissue has crept over the top edge, the center panel has lifted, and every reach for a mug shifts the underwire.
That afternoon mismatch is the classic bra too small problem, and the tag in your closet is a weak witness. A familiar number can hide short cup volume, a band doing the wrong job, or straps stealing support they were never built to carry.
You don't need a new drawer of bras before dinner. You need a symptom read, a short check that separates band compression from cup-volume mismatch, and an honest line between a tweak that helps and a tweak that only feels like it does.
Table of Contents
- Spotting the Signs a Bra Is Too Small
- Checking Band and Cup Fit at Home
- Quick Fixes to Try Before Replacing a Bra
- Measuring Correctly and Testing Fit in Motion
- Choosing Between Exchanges, Bralettes, and Other Cuts
- Next Steps to Find a Better Fit Today
Spotting the Signs a Bra Is Too Small
Start with what the bra is doing on your body, not with the size printed inside. A bra too small usually announces itself in one place while another part still looks calm. The band can feel acceptable at 9 a.m. and the bust can be spilling by midafternoon. That split is the clue. Comfort in one zone doesn't clear the other zones.
A 2008 peer-reviewed study of 30 young women with thoracic or posterior chest-wall pain found that 80% wore an incorrectly sized bra: 70% were in bras that were too small and 10% were in bras that were too large. The too-small group was seven times the too-large group. A separate 2013 study in that same report found an even higher miss rate, 93%, including 57% in bras that were too small and 36% in bras that were too large. Relationships between fit and pain were small in that first sample, so a symptom isn't a diagnosis by itself. The pattern still tells you where to look first.
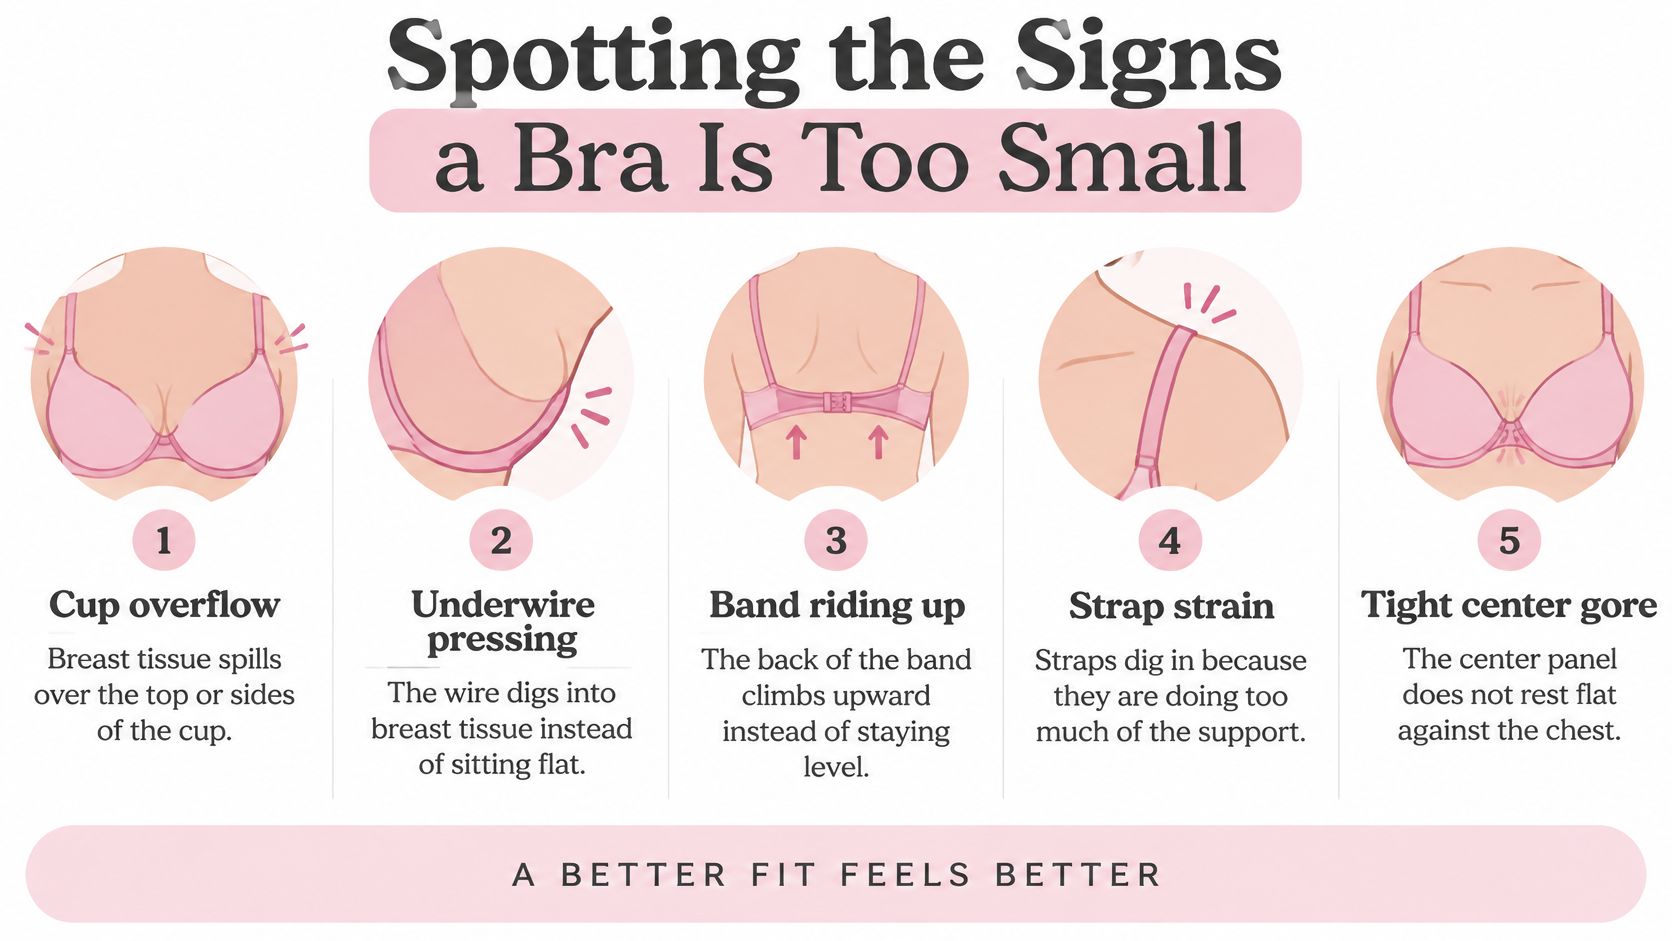
What each sign is usually saying
- Cup overflow: Breast tissue spilling over the top or out the side, while the band stays level, usually means the cup lacks depth or the cup shape doesn't match you. The number on the band can be fine. The volume isn't.
- Underwire on tissue: A wire should frame the breast, not sit on it. Pressure on the breast itself points to a cup that's too small or too shallow, not to a strap you forgot to tug.
- A band that climbs: A back band that creeps toward the shoulder blades is often too loose, over-tightened at the straps, or both. Climbing is a support problem. It isn't automatic proof that you need a smaller everything.
- Strap grooves: Deep shoulder marks mean the straps are carrying load the band should share. Loosening them without fixing the cup or band just moves the ache.
- A floating center gore: If the center panel won't rest on the sternum, the cups are often too small or the wrong shape, so the bra is being pushed off the body.
A band that feels fine and a cup that overflows are not the same problem. Treat them as separate reads before you change a size.
Normal adjustment is a strap you nudge once, or a band that settles after you scoop tissue into the cup. Real sizing trouble repeats: spillage after you resettle, wire that migrates onto tissue, or a gore that lifts every time you sit. If two or more of those show up on the bra you wear most, the checklist has done its job. You've found a fit issue, not a bad day.
Checking Band and Cup Fit at Home
Give this about five minutes and a mirror. Put the bra on the loosest hook first. A new or lightly worn band should have room to tighten later. Starting on the tightest hook hides stretch you haven't earned yet, and it makes a borderline band feel like the right one.
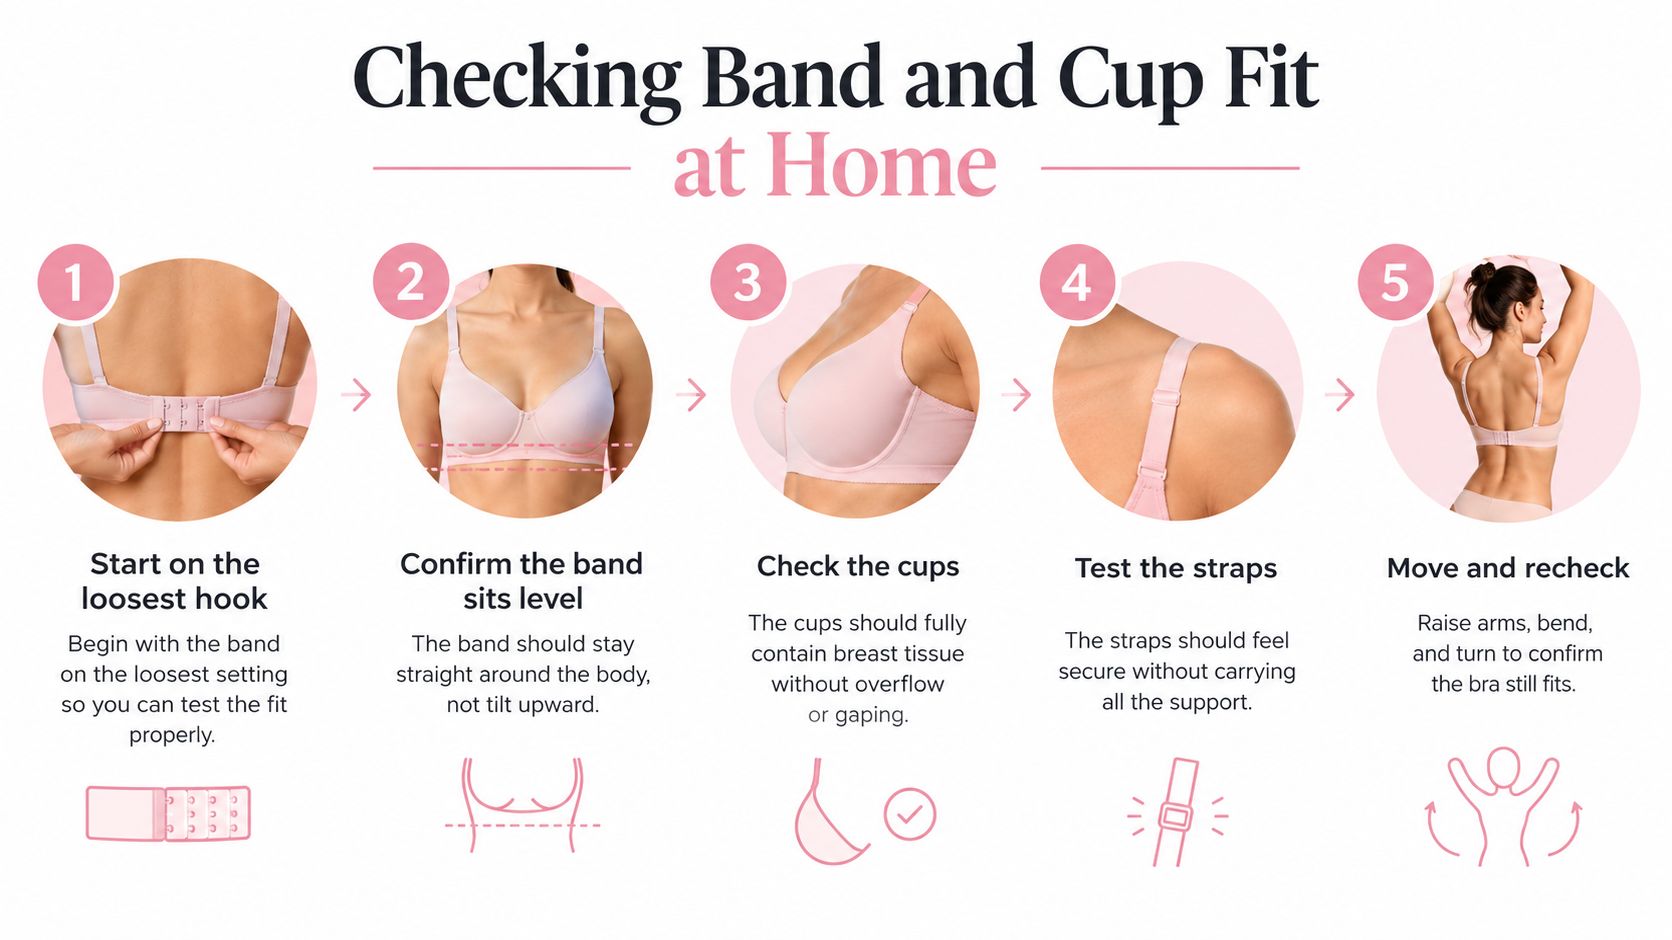
Run the checks in this order
- Band level. Look at the back in the mirror or a photo. The band should stay horizontal, parallel to the floor. An upward tilt means the band isn't holding, or the straps are hauling it up.
- Center front. The gore should lie flat on the sternum without you pressing it there. A gap that returns the moment you let go is a cup-volume or cup-shape miss.
- Cup edge. Smooth tissue into the cup, then look for spill at the neckline and at the side. Top or side spill with a level band points to insufficient cup volume or a shape that doesn't match your breast, not to a band you should crush tighter.
- Underwire path. The wire should rest fully around the breast and end near the side of the ribcage, not on breast tissue. If you can feel wire on the breast, the cup is sitting in the wrong place.
- Straps loosened, then repeat. Drop the strap tension so the straps aren't masking the bra. Recheck the band, the gore, the spill, and the wire. If the cup fails only when the straps go slack, strap tension was faking a fit.
How to read the result
Band compression shows up as a level-but-painful band, red marks that don't fade, or a band you can barely fasten on the loosest hook while the cups still contain you. Cup-volume mismatch shows up as spill, a lifted gore, or wire on tissue while the band stays level. You can have both. A too-small cup can make a correct band feel savage because tissue has nowhere to go and shoves the whole bra down.
A controlled bra-fitting intervention found that every participant failed the fit assessment in their usual bra. After professional fitting, 87.5% still failed that study's standard bra assessment, while only 4.2% failed with an alternative measurement-and-fitting approach. The alternative bra also cut pain prevalence by 36% versus the control condition. A single professional pass isn't magic. The method has to separate band and cup, then get rechecked.
If spill and a level band show up together, chase cup volume or cup shape before you touch the hook.
Watch the short version of the same sequence, then run it on the bra you're wearing.
Write one line for yourself: band, cup, or both. That line decides the next move. Tweaks come first only when the failure is tension, not missing volume.
Quick Fixes to Try Before Replacing a Bra
Some tightness is break-in, not a wrong size. Some is a wrong size wearing a break-in costume. Try the reversible fixes below on a day you can feel the bra, not on the morning you're already late.
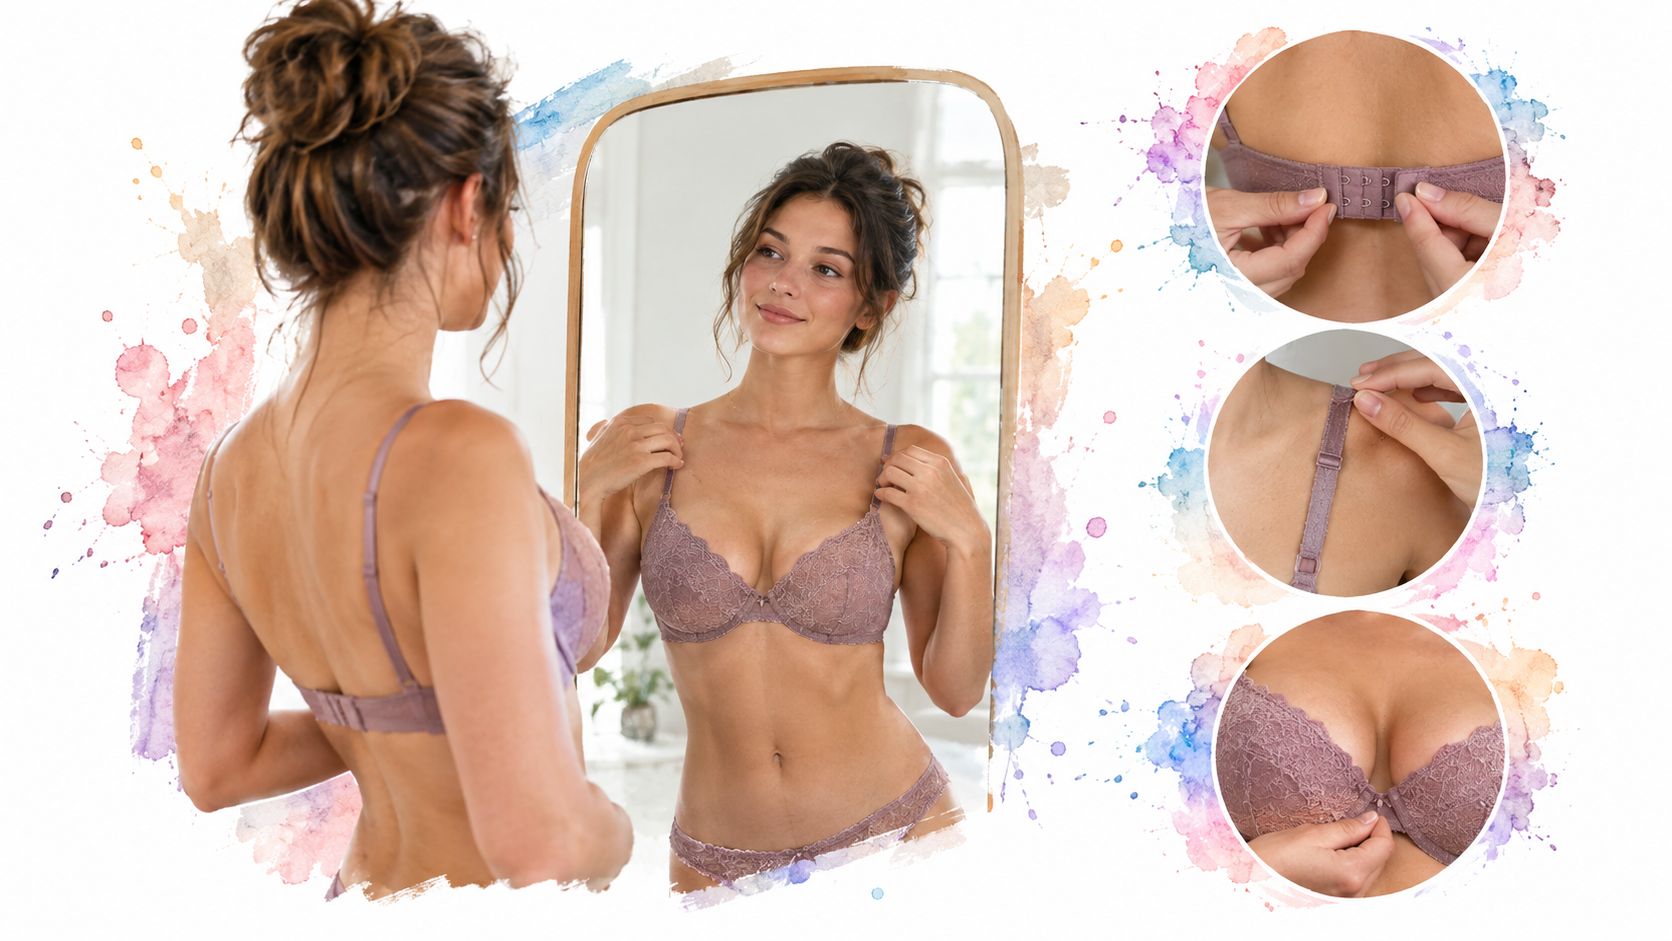
Fixes that earn their keep
Move one hook looser, only if the cups already contain you. A firm new band often eases after a few wears. Use the looser hook while it settles, then move inward as the elastic relaxes. This backfires on a bra you've owned for months. If the loosest hook is the only one you can stand, and the cups still spill, the band isn't the villain. The volume is.
Reset strap length so both shoulders share a light load. Straps should stay put without carving grooves. Shorten a slipping strap a little. Lengthen a digging strap a little. Stop once the band is doing the holding. The trap is treating straps as the whole support system. Loosening them and walking away shifts weight onto the band and leaves a small cup exactly as small as it was.
Scoop before you fasten, then again after. Lean forward, guide all the tissue into the cup from the side and from under the arm, then stand and fasten. A lot of "too small" at 8 a.m. is tissue left outside the cup. If spill returns within an hour, the cup doesn't have the depth. Scooping won't invent it.
Read a riding band as a shallow-cup clue when the front is already full. If the back climbs and you're spilling, tightening the straps makes the climb worse. A shallow cup pushes the bra away from you. No hook setting fixes a cup that can't hold the bust.
When to stop tinkering
Use a temporary setup for a bra you must wear this week: looser hook if the band alone is the pinch, straps even and light, tissue fully scooped, and a camisole if the edge still shows. That's a bridge, not a size.
Stop when any of these survive the fixes: spill after a proper scoop, wire on breast tissue, a gore that will not lie flat, or shoulder pain that returns the same day. At that point another hole on the hook row is busywork. Change the cup, the band, or both. A bra that only feels better for twenty minutes isn't getting better. It's waiting until you're busy enough to ignore it.
Measuring Correctly and Testing Fit in Motion
A tape measure is a starting note, not a verdict. People measure carefully and still pick a bra that fails once they move. Measure anyway, because you need both numbers, then make the bra prove itself in the motion you do.
Two numbers, tape level
Measure the underbust on bare skin or a thin top, tape level all the way around, snug enough to stay put and not tight enough to indent. Breathe out normally. Don't suck in. Then measure the fullest part of the bust in a soft, non-padded bra, or braless if that's how you usually are measured, again with the tape level and not cutting in. Write both numbers down. A familiar band with a bust number that needs more cup is a common way a bra too small gets labeled "my usual size."
Sister sizes and regional charts, including the differences you'll see on a 44B size guide, are maps between labels. They don't promise the same cup depth, the same wire shape, or the same band feel. Record the raw measurements, then let the mirror and the movement test overrule the chart when they disagree.
Make it move
Standing still is the easy exam. Do repeated arm raises, torso rotations, a brisk walk, and a few controlled jumps. Watch for wire migration, skin pressure, chafing, and how much the breast moves. Note what you feel before and after, not only what the mirror shows at rest.
Biomechanics research reports that breast displacement during exercise can exceed 10 cm in larger-breasted participants, while as little as 2 cm of vertical displacement may be uncomfortable for some people. In an intervention with 30 elite UK athletes, 25% had breast pain, and 25% of those affected said the pain kept them from performing fully. After a prescribed support bra, 87% reported benefits, including less movement for 73% and greater garment comfort for 53%.
A desk bra that looks perfect in a still photo can still fail the first time you jog for the bus.
Use two stages on purpose. Keep a correctly sized everyday bra for static comfort. Use a separate activity design when you run or jump. Tighter compression isn't a substitute for a cup that contains you. Pain during movement isn't a personality trait you have to keep. If the wire travels, the band twists, or you chafe in one short test, that bra isn't your activity bra, even if the tape said the size was right.
Choosing Between Exchanges, Bralettes, and Other Cuts
Once the check says the size or the cut is wrong, you've got three real paths. Exchange the size. Change the cut. Try another brand's grading. None of them is a personality test. Match the option to the symptom you already wrote down.
The band-and-cup idea itself took decades to show up. Cup-size history notes that in 1932 alphabetic A-to-D labels described shape or pendulousness more than a standard volume, and by 1935 a volume-based A-to-D system was in use. Earlier shoppers often bought by chest or band alone. One retailer's 1932 bras were sold in band sizes 32–38, with cup letters arriving in the UK much later, from 1969, after small, medium, and large categories in the late 1940s. That's why a "correct" band number can still be a bra too small in the cup. The two measurements were never the same decision.
Self-selection stays shaky even with charts. One assessment found 85% of participants in ill-fitting bras, and their chosen sizes differed significantly from assessed sizes, as reported in this fitting study. Trying several bras, or following a formula, didn't reliably land a good fit. Sister sizing, one band down and one cup up, or the reverse, is a starting guess. It isn't the same fit in a new color.
Choosing the Right Option After a Fit Check
| Option | Best When | What to Watch |
|---|---|---|
| Exchange band or cup | Spill with a level band, or a band that chokes while the cup is roomy | Don't change both at once if you can help it. Fix the failing piece first. |
| Different cut, wireless or bralette | Wires sit on tissue, or you want low-impact ease rather than structured lift | Less structure can mean less containment when you move. Test it, don't assume soft equals fitted. |
| Another brand's grading | The symptoms persist across several sizes of one label | A new chart is still a guess. Re-run the hook, gore, and spill checks. |
A pull-on style can be the right change when hardware and wires are the irritant, not when you need high-impact hold. The NuCloud Bra is a wireless pull-over in S–XL, described as best for A to D cups, with sealed padding, all-around stretch, and a tip to size up if you're between sizes. It has no hooks and no wire, so the home check shifts to containment, edge comfort, and whether it stays put when you lift your arms. For a wider look at unstructured styles, this wireless bra guide is a useful companion to the table, not a replacement for the symptom you already logged.
If the gore won't sit and the wire won't clear tissue, a new hook setting in the same cut won't save the week.
Pick the row that matches your note. Exchange when volume or band tension is the miss. Switch cuts when the hardware is the miss. Switch brands when one label's cup shape never matches you. Then test the new piece the same way you tested the old one.
Next Steps to Find a Better Fit Today
You already have the path. Read the symptom. Separate a tight band from a short cup. Measure both numbers without letting the chart boss you. Use a quick fix only when tension is the issue. Exchange, change cut, or change brand when volume, wire placement, or shape is the issue. Test the winner in the movement you do, not only in a still mirror.
Do one thing today, on the bra you wear most. Put it on the loosest hook, scoop, and write three words: band, cup, straps. Circle the one that fails. If only the band pinches and the cups contain you, use the looser hook and reset the straps for this week. If you see spill, wire on tissue, or a gore that lifts, stop adjusting. That bra needs a different size or a different cut. Order the exchange while the feeling is fresh. Memory gets generous by the weekend, and you'll talk yourself back into the same hooks.
Before you check out a new size, read the shipping, returns, and Best Pair Guarantee details so you know the window for sending a miss back. A fit experiment is cheaper when the return path is clear. Keep the note you wrote. If the replacement fails in the same spot, you've learned the cut is wrong, not that your body is difficult.
Small corrections add up faster than a closet overhaul. One band that stays level changes how your shoulders feel by lunch. One cup with enough depth stops the constant tug at your neckline. An activity bra kept separate from your desk bra stops you treating pain as the price of a walk.
The bra you wear most is the only one worth fixing first. The others can wait until that one passes the check.
You've done the hard part, which is knowing which failure you're looking at. Take ten minutes with that everyday bra, circle the miss, and either set the temporary fix or start the exchange. Your afternoon will feel different when the bra stops arguing with you.
Nuage Wears builds comfort-first bras and everyday intimates for long wear, with fit guidance in The Journal plus shipping, returns, and a Best Pair Guarantee when a size misses. If a bra too small has been running your day, use the symptom check above and then visit Nuage Wears to compare a softer cut or a fresh size against the note you just made.