
80% of women wear the wrong bra size, including 70% in bras that are too small and 10% in bras that are too large. For large breasts, the answer isn't just “get professionally fitted.” You need the right size, a verified fit, and a bra engineered to carry weight through its band and cups.
That distinction matters because a cup label doesn't describe fit by itself. A cup works with a band, and the same letter can represent different cup volumes as the band changes. Your body also isn't static. Hormonal changes, activity, diet, and normal fluctuations can alter how a bra feels from one day to the next. Treat your size as a current starting point, not a permanent identity.
Table of Contents
- Why Your Current Bra Is Failing You
- The Engineering Behind Superior Support
- Your Final Fit Verification Checklist
- Solving Common Large Bust Support Issues
- Preserving Support Through Proper Care
Why Your Current Bra Is Failing You
The common advice is to get measured, accept the result, and stop questioning the label. That approach is too simplistic. A peer-reviewed study found that 80% of participants wore incorrectly sized bras, with most wearing bras that were too small, and it also found that breast size was strongly associated with poorer fit. The study's findings on bra sizing and fit confirm what experienced fitters see repeatedly: the problem often isn't your body. It's a garment that can't contain, support, or distribute your weight properly.
A too-small cup creates immediate symptoms. Breast tissue spills over the neckline or underarm, the center gore floats away from the chest, and the wires sit on tissue instead of around it. Many women respond by loosening the straps, but that shifts more weight onto the shoulders while leaving the underlying problem untouched.
A too-tight band causes a different kind of distortion. It can feel restrictive across the ribs, encourage the straps to dig, and make you assume that the entire bra is too small. A loose band rides upward, which reduces stability and forces the straps to compensate. Neither problem is solved by focusing on the cup letter alone.
Stop treating a size as a fixed identity
Your measurements can change, and different brands or bra shapes can fit differently even when their labels match. A plunge, balconette, full-cup, wireless, or molded style may distribute the same breast volume in very different ways. Fit is the result of the relationship between your body and that specific design.
Modern sizing developed in stages. S.H. Camp and Company first used alphabetic cup sizes from A through D in October 1932, Warner's introduced an Alphabet Bra with A through D cup sizes in 1935, and the band-and-cup system widely used today took shape in the 1940s. This history of bra sizing explains why large-bust fit still depends on both measurements rather than a cup label alone.
The historical shift mattered because it moved bra sizing away from one-dimensional chest measurement toward a system that could account for breast volume. That was a practical engineering response, not a decorative detail. Larger breasts need different depth, containment, materials, and load distribution.
Practical rule: If your breasts spill, your band moves, or your straps carry the whole load, question the fit before blaming your body.
Your drawer is giving you useful evidence
Put on a bra you regularly avoid and assess it without adjusting anything. Look for red marks that persist, tissue escaping at the neckline or sides, a band that tilts upward, or cups that wrinkle because they don't match your shape. These clues tell you which part of the construction is failing.
Don't assume discomfort is the unavoidable price of support. A well-designed bra can feel secure without feeling punishing, and a comfortable bra can still provide control if its band, cups, and seams are doing the work.
The Engineering Behind Superior Support
Supportive bras for large breasts are built as load-distribution systems. The band anchors the garment around your ribcage, the cups hold and separate breast tissue, and the straps stabilize the upper edge. Straps matter, but they shouldn't be the primary lifting mechanism.
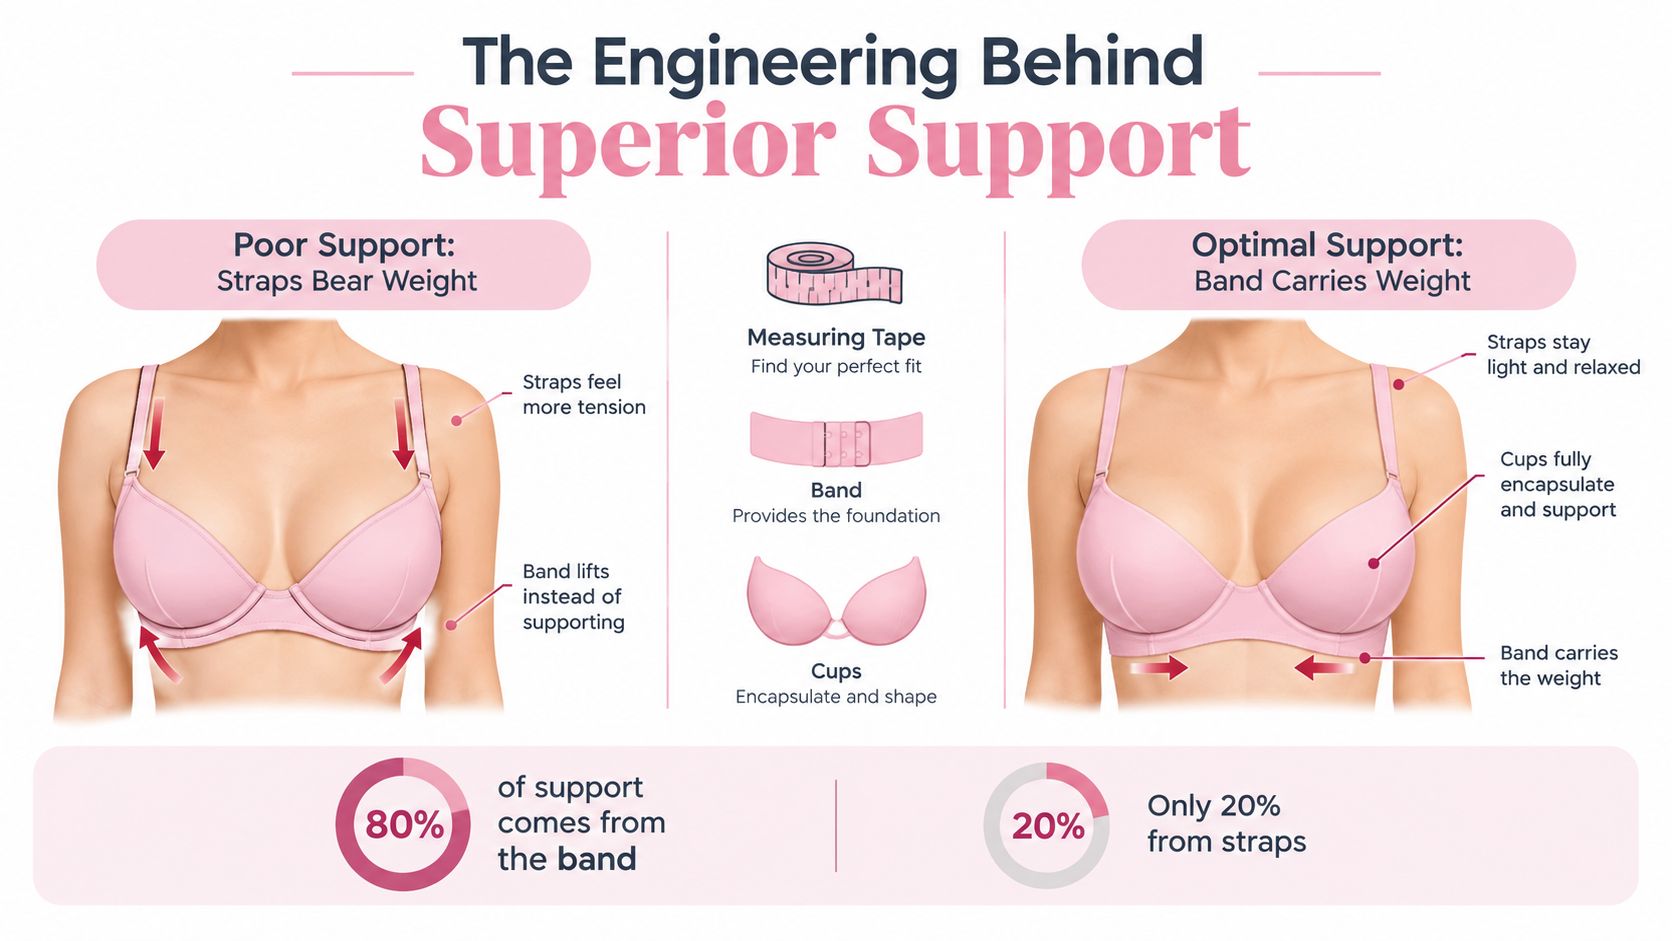
Compare the parts that create support
A narrow, highly elastic strap may feel soft at first but can concentrate pressure on a small area. Wider straps spread that pressure, while adjustable sections let you set the lift without pulling the entire cup upward. The strap should lie flat and stay in place, not carve into your shoulder.
The band is the foundation. Look for firm but flexible fabric, a stable lower edge, and enough width to resist rolling. A band that stays level around your torso gives the cups a stable base. A band that rides up is losing the support battle before you leave the house.
Cups should encapsulate, not just compress. Encapsulation separates breast tissue into individual cups and supports it from beneath and at the sides. Compression presses tissue toward the chest, which can reduce movement in some designs but may create a flattened shape, side spillage, or pressure points when the garment lacks enough structure.
Side panels and boning can help keep tissue directed forward rather than allowing it to migrate toward the underarm. These features should feel supportive, not sharp. If side support pokes or rests on breast tissue, the cup shape or size needs attention.
| Feature | Purpose | Indicator of quality |
|---|---|---|
| Firm band | Anchors the bra around the ribcage | It stays level during movement without rolling |
| Full or deep cups | Contain breast tissue and reduce overflow | No cutting at the neckline or underarm |
| Wide, stable straps | Distribute upper-body pressure | They stay flat without digging |
| Side panels or boning | Guide tissue forward and limit sideways movement | The panel supports without poking |
| Structured seams | Shape and reinforce the cup | Seams lie flat and don't distort |
| Secure closure | Maintains the intended band tension | The bra stays stable on a comfortable setting |
Choose construction over decoration
Lace, padding, and smooth finishes can be useful, but they don't automatically create support. Prioritize the pieces you can assess under your clothing: cup depth, band stability, side containment, strap width, and a closure that allows adjustment.
A full cup often gives more containment than a low-cut shape, but coverage isn't the same as support. A shallow full cup can still spill at the top, while a deeper cup with strong side construction may contain more comfortably. The right design depends on your breast shape as well as your volume.
Wireless styles can work when they use firm underbust construction, reinforced panels, and cups that hold their shape. A soft, highly stretchy bralette may be comfortable for lounging but can struggle during long days or active movement. Don't reject wireless bras automatically, but inspect their engineering with the same scrutiny you'd apply to an underwired style.
Your Final Fit Verification Checklist
Try on a new bra as though you're testing equipment, not admiring a label. Fasten it on the loosest hook when it's new, because the band will need room to tighten as the elastic relaxes. Then complete the fit check in front of a mirror.
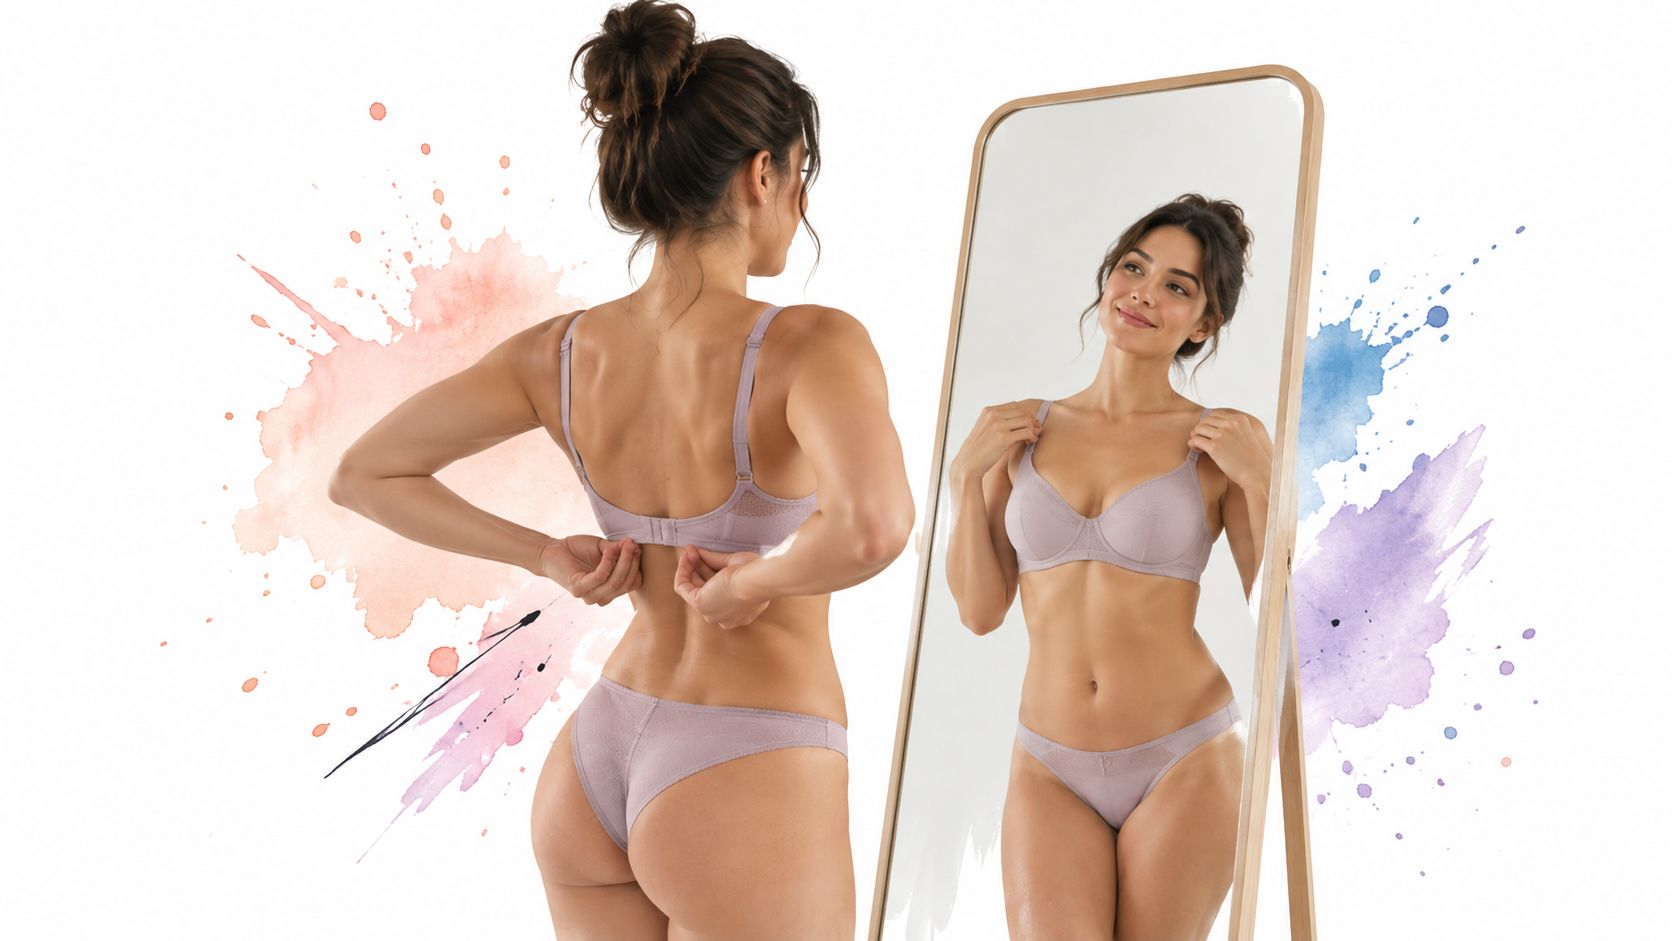
Put the bra on correctly
- Settle the band first. Fasten the bra and make sure the band sits horizontally around your torso. If it climbs up your back, it's too loose or the fabric lacks stability.
- Scoop and swoop. Lean slightly forward, reach into the side and bottom of each cup, and gently bring the breast tissue forward and upward into the cup. This places tissue where the bra was designed to support it.
- Adjust the straps last. Tighten them only enough to keep the cup edge smooth and the straps secure. If the straps need extreme tension to create lift, the band or cup isn't doing its job.
- Check the center gore. On a wired bra, the gore should sit against the breastbone without pressing painfully. If it floats, the cups may be too small, the shape may be wrong, or the style may not suit your chest.
- Inspect every edge. Look at the neckline, underarm, and lower cup. Bulging, cutting, wrinkling, or empty space indicates a mismatch between your breast shape and the cup.
For a more methodical starting point, use this bra fitting measurements guide to record your underbust and bust measurements before trying styles. Measurements help narrow the search, but they don't replace the final wear test.
Know when to change the size relationship
If the band feels too loose but the cups fit, try a smaller band with a larger cup. If the band feels firm and level but the cups cut in, try a larger cup in the same band. This is often called a sister-size adjustment, but don't treat it as an automatic fix. Changing the band also changes the cup volume, wire length, and proportions.
A bra can pass a quick mirror check and still fail after movement. Walk, bend, raise your arms, sit at a desk, and take a few deep breaths. The band should remain stable, the cups should keep tissue contained, and no single component should become painful.
A professional fitting is a starting measurement, not a final verdict.
The research supports that caution. In a study of 24 larger-breasted women, every participant failed the fit assessment in the bra they usually wore, and 67% still failed after wearing a professionally fitted bra. The study report concluded that professional fitting alone doesn't guarantee correct fit. Fit assessment, design revision, and objective support testing belong in the process.
For everyday options, consider how fabric affects comfort as well as structure. A cotton bra guide for large breasts can help you compare breathable materials with the support features you need.
Solving Common Large Bust Support Issues
A customer with a fuller bust often arrives with three complaints at once: the straps hurt, the back band bulges, and breast tissue escapes at the sides. Those symptoms can look unrelated, but they usually point to poor load distribution. Fixing one component may ease the others.
When the straps dig
Strap pain usually means the band isn't carrying enough of the weight, or the straps are too narrow for the load. Start by checking whether the band is level. If it rides upward, tighten the band or reassess the size. If it stays level but the straps still hurt, choose wider, padded, or more stable straps and reduce their tension.
A racerback option can improve stability for some shoulders because it changes the direction of pull. It isn't a cure for a loose band, and it may create neck tension if the straps sit too close together. Treat it as a configuration choice, not a substitute for a secure foundation.
Wireless designs can also relieve pressure when their lower band and cup panels are properly reinforced. For nursing needs, this guide to a supportive nursing bra for large breasts offers useful design considerations, especially around access, adjustability, and containment.
When the back band bulges
A back bulge doesn't automatically mean you need a larger band. A larger band may reduce immediate pressure but can also lose the stability needed to lift. Band width and band circumference are different variables. A wider band can distribute pressure across more skin without changing the ribcage measurement.
Look for a broader, smoother back panel with firm elastic and enough vertical coverage to stay in place. Check it while moving, not only while standing still. If the fabric rolls or the hooks pull away from the body, the construction isn't stable enough for your shape or activity.
Your clothing can influence what you see, too. A rigid, narrow band may create a sharper edge, while a flexible smoothing panel can distribute the same pressure more evenly. The aim isn't to erase your body. It's to prevent the bra from creating unnecessary pressure points.
When tissue spills at the sides
Side spillage usually means the cup lacks width, depth, or both. Scoop and swoop before judging the result, then check whether tissue remains outside the underarm edge. If it does, try a larger cup or a cup shape with stronger side containment.
Compression may make the outline look smaller for a moment, but it can push tissue sideways and flatten the bust. Encapsulation generally creates a more separated shape and gives the band and seams a clearer job. If your priority is lift and definition, choose containment over aggressive flattening.
For a minimizer effect, look for a design that spreads volume across the cup without crushing the breast against the chest. A comfortable minimizer bra guide can help you evaluate that trade-off before choosing a style for workwear or fitted clothing.
Preserving Support Through Proper Care
A bra can fit correctly on its first wear and still lose support when washing, drying, or storage weakens its elastic, seams, or molded cups. Care determines how consistently the garment holds your body, so treat it as part of fit management rather than a minor household task.
Wash with less force
Handwashing is the safest default for structured bras. Fill a basin with cool or lukewarm water, add a small amount of gentle detergent, and let the bra soak briefly. Press water through the fabric instead of scrubbing the cups, twisting the band, or wringing the garment.
If machine washing is the practical choice, fasten the hooks and place the bra in a lingerie bag. Select a gentle cycle with cool water, then remove the bra promptly. The bag limits tangling and helps prevent straps and closures from catching on other garments.
Skip fabric softener. Its coating can interfere with the elasticity that lets the band and straps recover after wear. Strong detergents and high heat can weaken structured lingerie even when the damage is not immediately visible.
Dry the shape, not just the fabric
Never put a structured bra in a hot dryer. Heat can weaken elastic and distort molded cups, leaving the bra looking intact while its support becomes uneven.
After rinsing, press the bra between clean towels to remove excess water. Lay it flat or drape it over a drying rack from the center of the band. Hanging it by the straps puts unnecessary strain on the attachment points while the fabric is wet.
Molded cups need careful handling. While the bra is damp, shape the cups gently with your hands, smooth fabric wrinkles, and let the garment air-dry away from direct heat. Do not fold one cup inside the other, because the pressure can create lasting dents.
Rotate your support wardrobe
Wearing one bra every day gives its elastic no time to recover. Keep several suitable bras in rotation and let each one rest between wears. Store them with the cups nested naturally. Do not crush them or force them into an overcrowded drawer.
Inspect each bra regularly for fatigue:
- Band recovery: Stretch the band gently and check whether it returns to its original tension.
- Cup shape: Look for dents, wrinkles, or areas that no longer hold their form.
- Strap attachment: Check for pulled stitches or stretched tabs.
- Closure stability: Confirm that hooks and eyes remain firmly attached.
- Wire condition: Stop wearing the bra if a wire bends, pokes, or shifts until you repair or replace it.
If your current bras show these signs, add a smooth-cup support style with firm band construction to the rotation. Nuage Wears offers comfort-first options for daily wear. Explore Nuage Wears by construction, fit, and care requirements, not by the cup label alone.